

A FLAKY, buttery pie crust that holds its shape and is vegan and gluten-free? It’s possible, friends. More than possible, it’s delicious! And it requires just 4 ingredients and 15 minutes of chilling!
It’s all made possible by our NEW all-purpose gluten-free flour blend, which has a neutral but sweet taste and creates a sturdy and reliable crust. All that’s left is to pick your favorite filling and impress your friends! Let’s make pie crust!
How to Make Gluten-Free Pie Crust
This recipe starts with combining our NEW gluten-free flour blend with a pinch of salt then mixing in cold vegan butter. It’s best to mix it in by hand so the butter can be pressed into “flakes” instead of being broken down into small pieces. Butter flakes = flaky crust!
Next, a small amount of maple syrup adds a touch of natural sweetness as well as a bit of structure. Adding sugar in the form of maple syrup also helps the baked crust have a classic, golden color!

Then it’s time to add water 1 tablespoon at a time. Only a small amount of water goes into the crust to bring everything together and create a soft and workable dough.
Then after chillin’, it’s time to get rollin’! Chilling for just 15 minutes ensures the vegan butter doesn’t harden too much and makes for effortless rolling with minimal cracks. YAY.
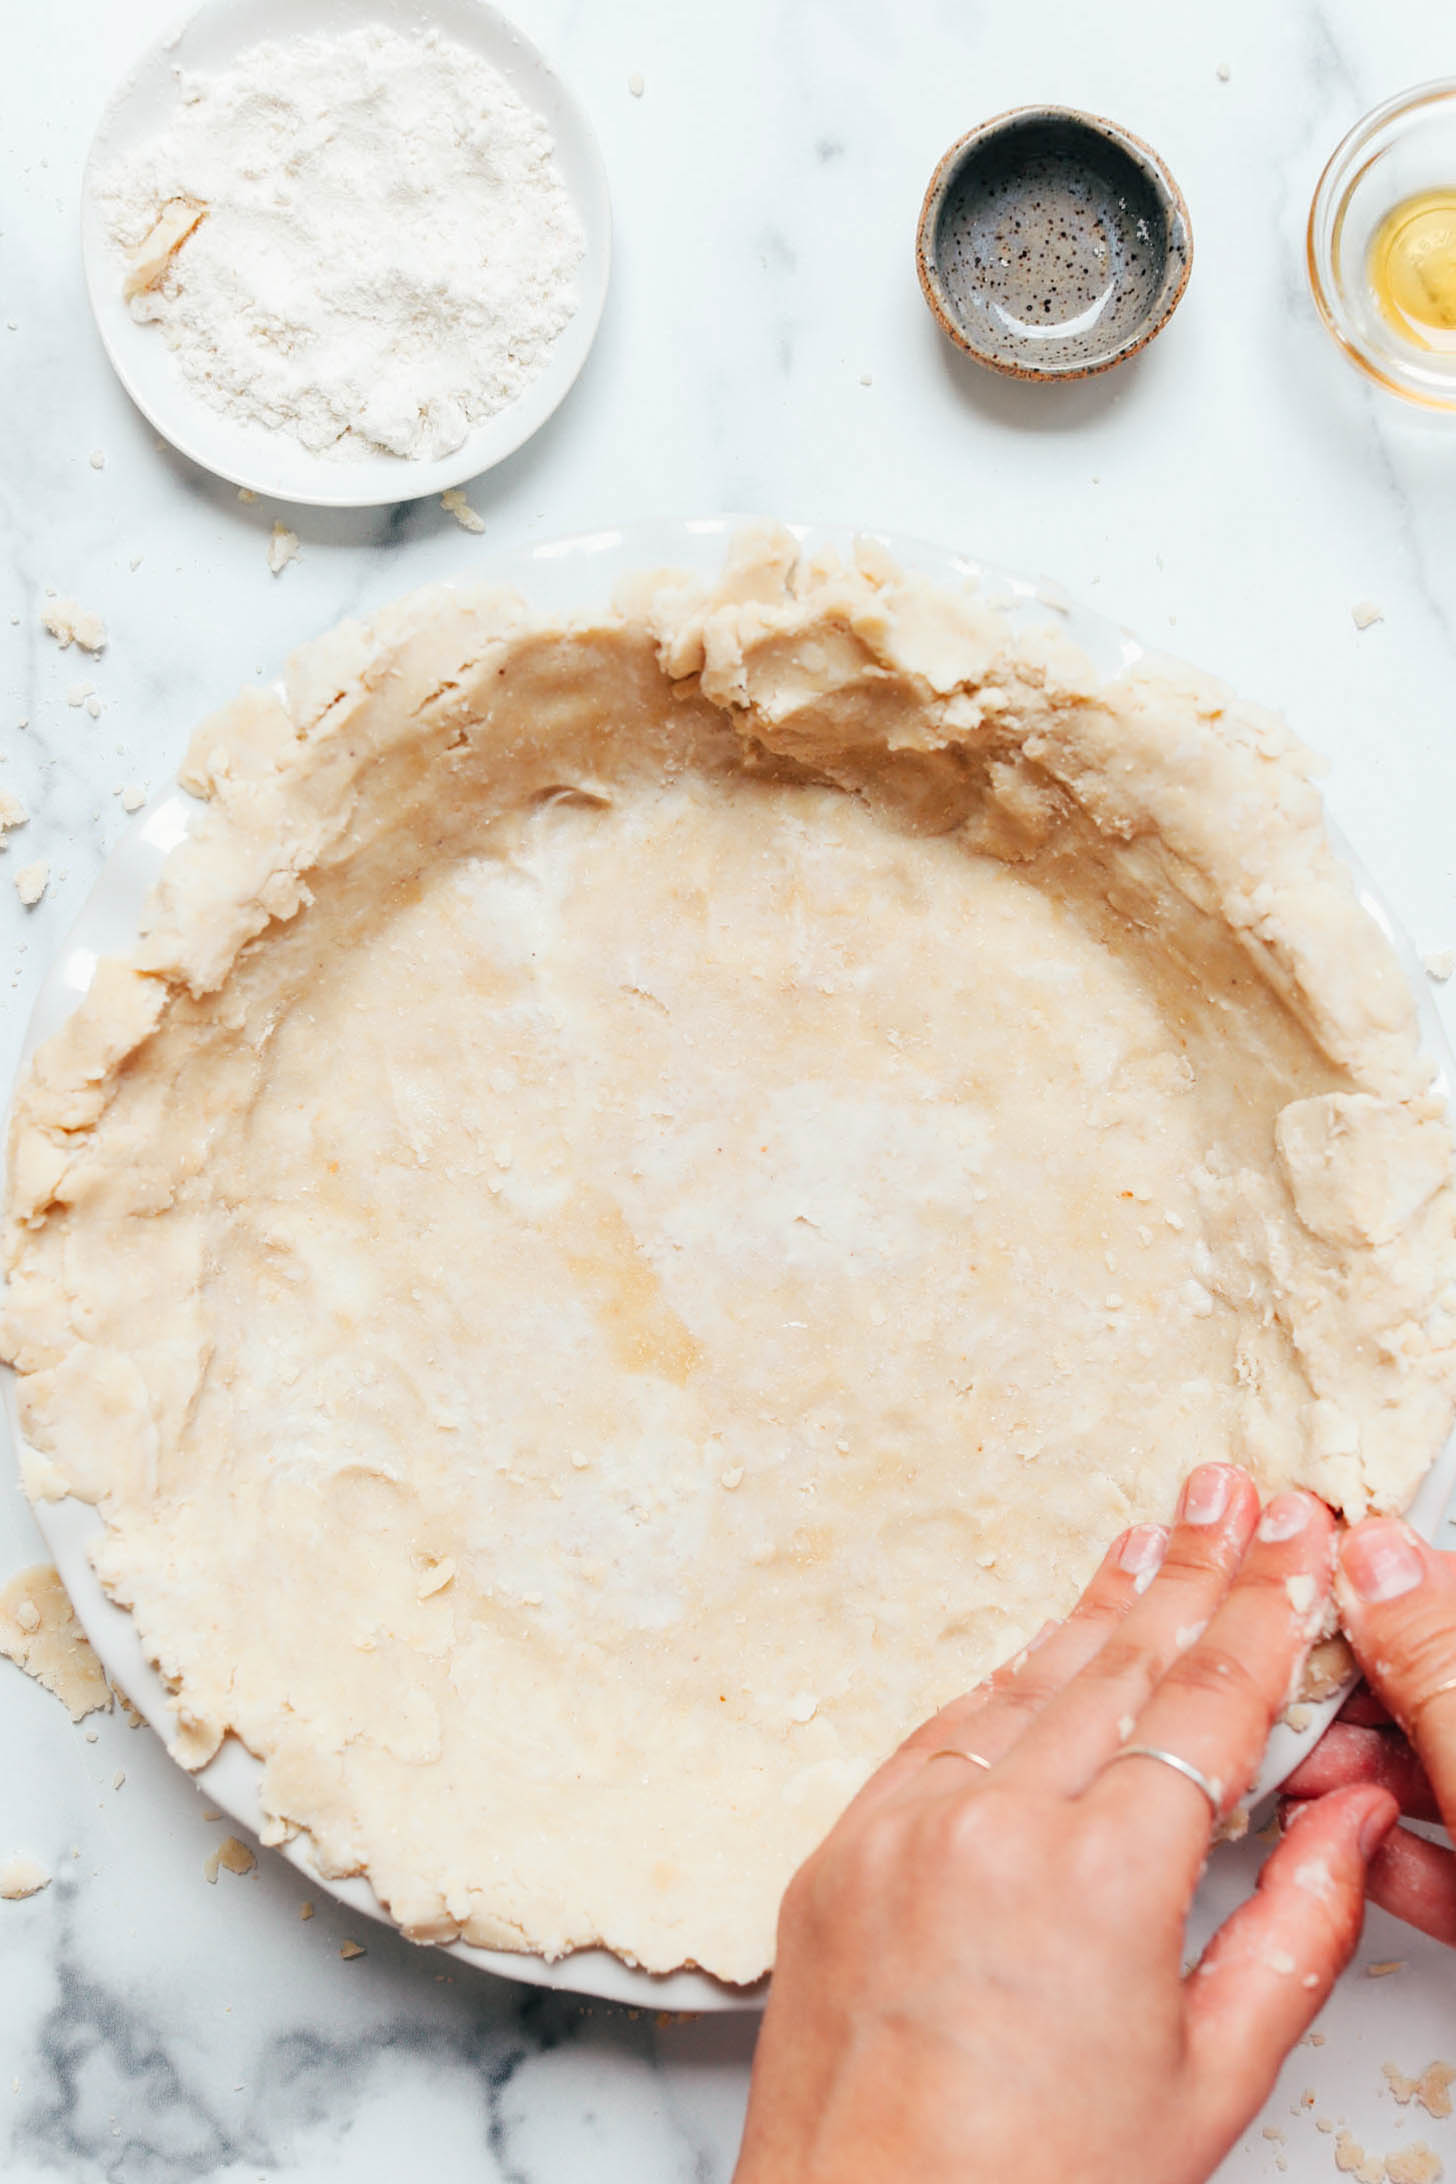
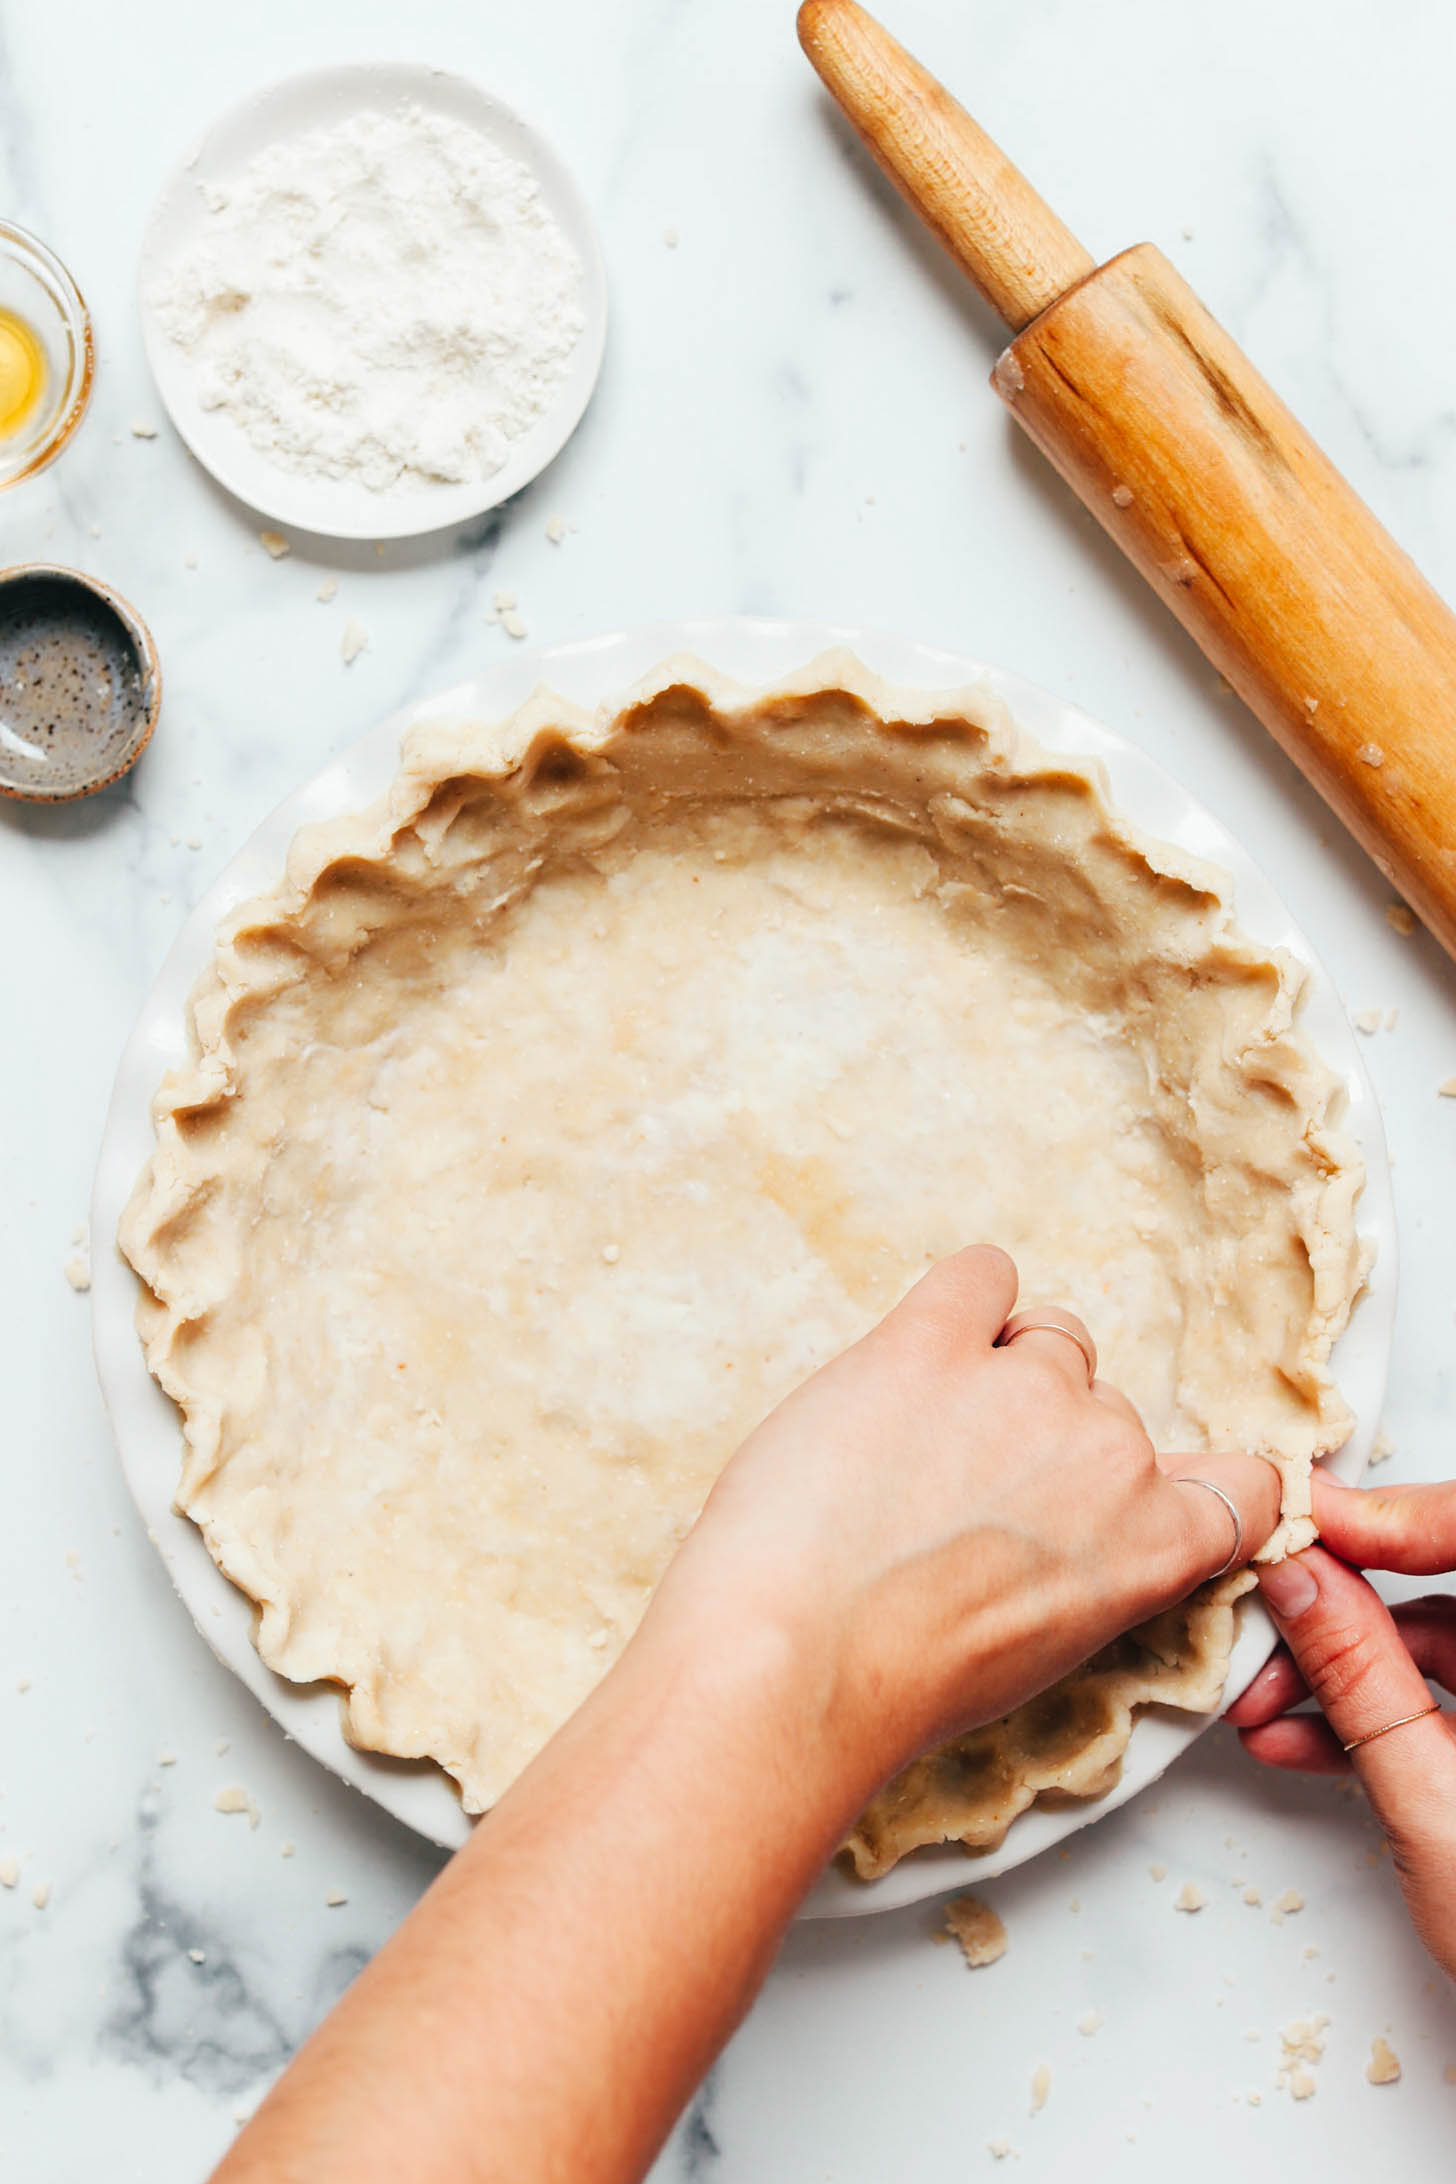
After a courageous flip into a pie pan (you can do it!), it’s time to smoosh any cracks that need fixing or patching and then crimp the edges for a classic pie crust look.
Lastly, the crust goes into the oven for 15-20 minutes to par-bake. This is an important step for a gluten-free crust as it prevents sogginess and ensures the finished crust stays crisp underneath the pie filling.
We can’t wait for you to try this gluten-free pie crust! It’s:
Flaky
Buttery (without dairy!)
Crispy on the edges
Tender on the bottom
Reliable
& Easy to make!
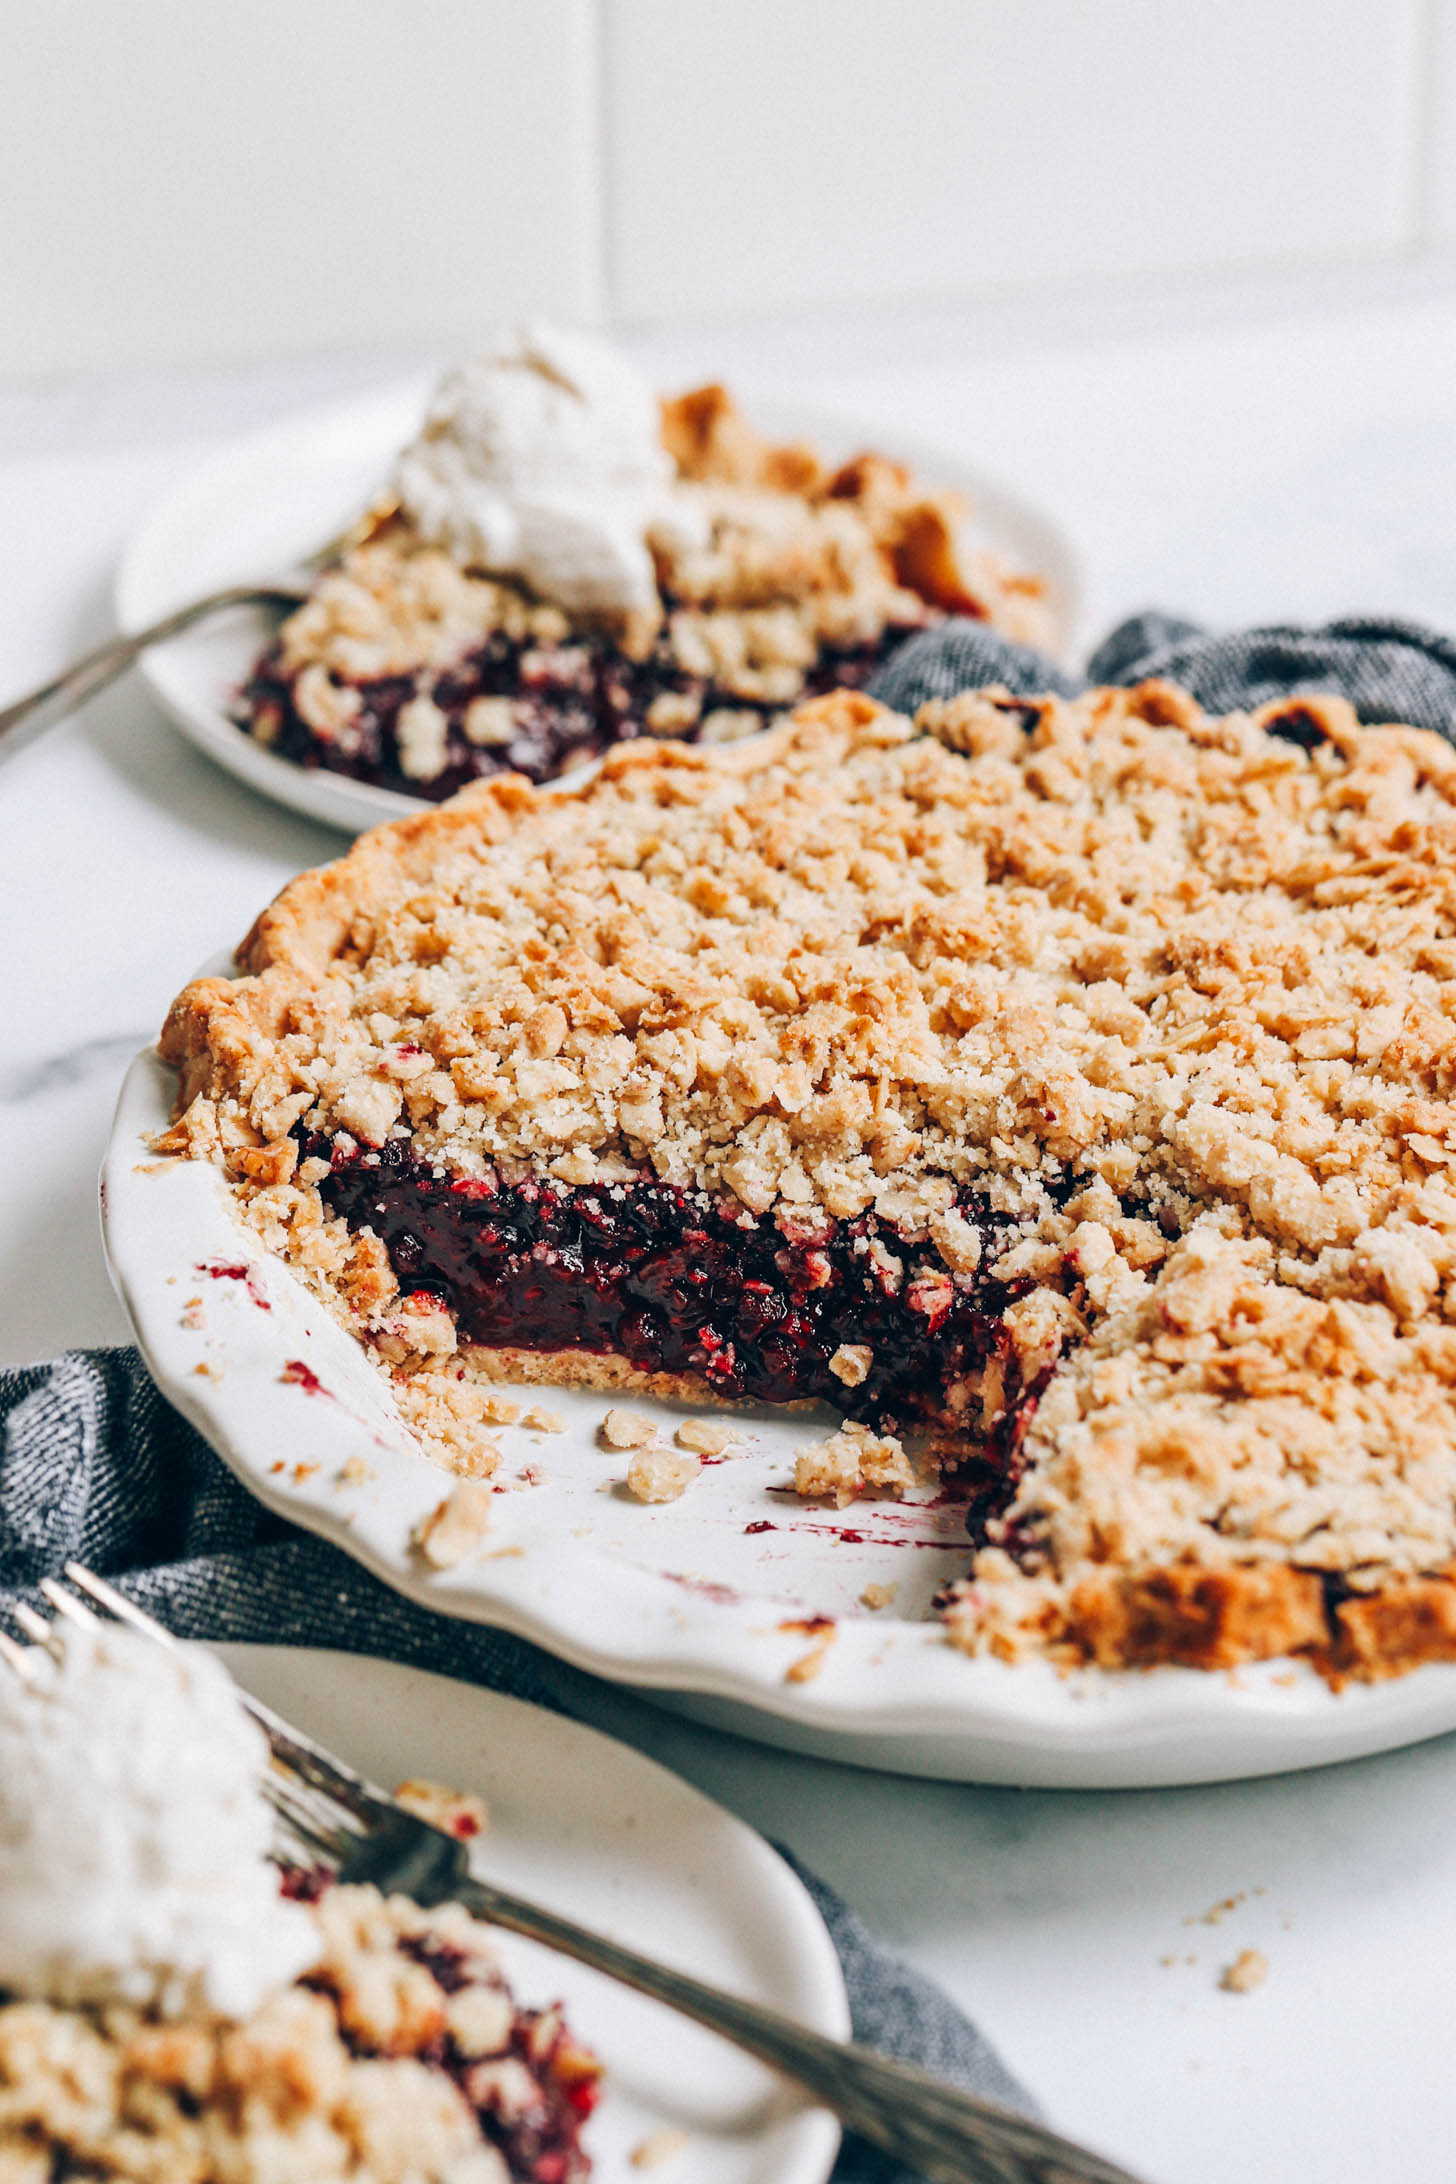
It’s a versatile base ready to make all your pie dreams come true. Use it to make pumpkin pie, apple pie, berry pie (recipe coming soon!), cream pies, and more.
More Gluten-Free Holiday Essentials
If you try this recipe, let us know! Leave a comment, rate it, and don’t forget to tag a photo @minimalistbaker on Instagram. Cheers, friends!
Servings 1 (9-inch pie crust)
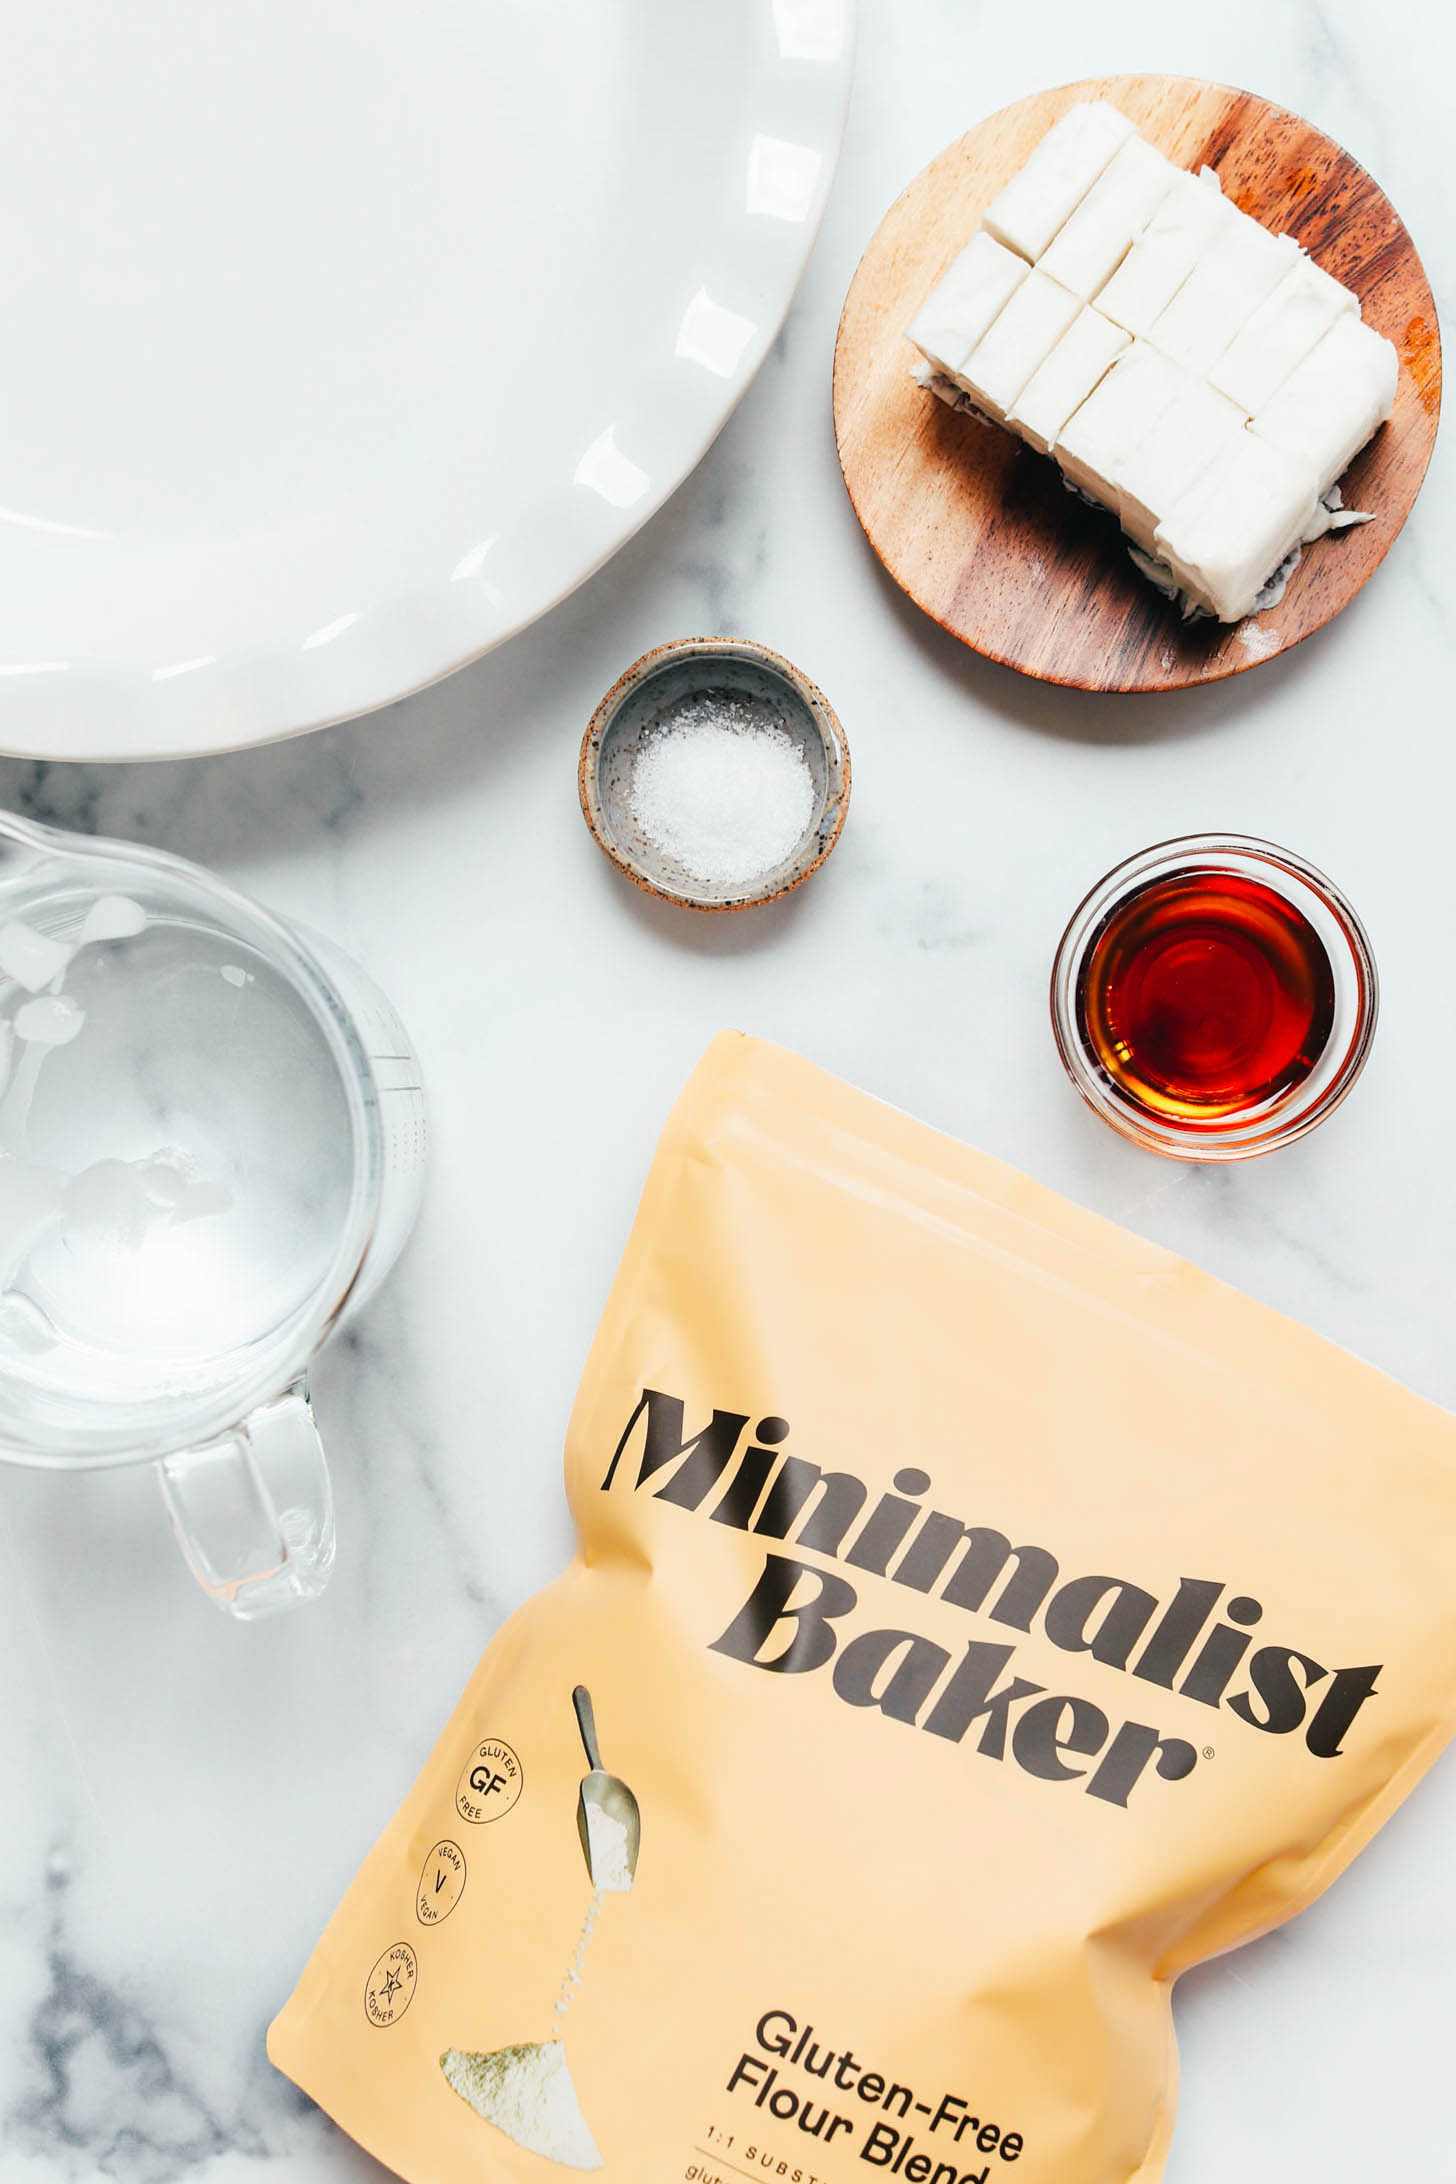
- 1 ½ cup Minimalist Baker Gluten-Free Flour Blend*
- 1/4 tsp sea salt
- 1/2 cup cold vegan butter, cut into 1/2 inch cubes (we like Miyoko’s in this recipe // dairy butter should also work if not vegan/dairy-free)
- 1 Tbsp maple syrup
- 3-4 Tbsp ice cold water
-
Preheat oven to 375 degrees F (190 C), and set out a standard size (9-inch) pie pan.
-
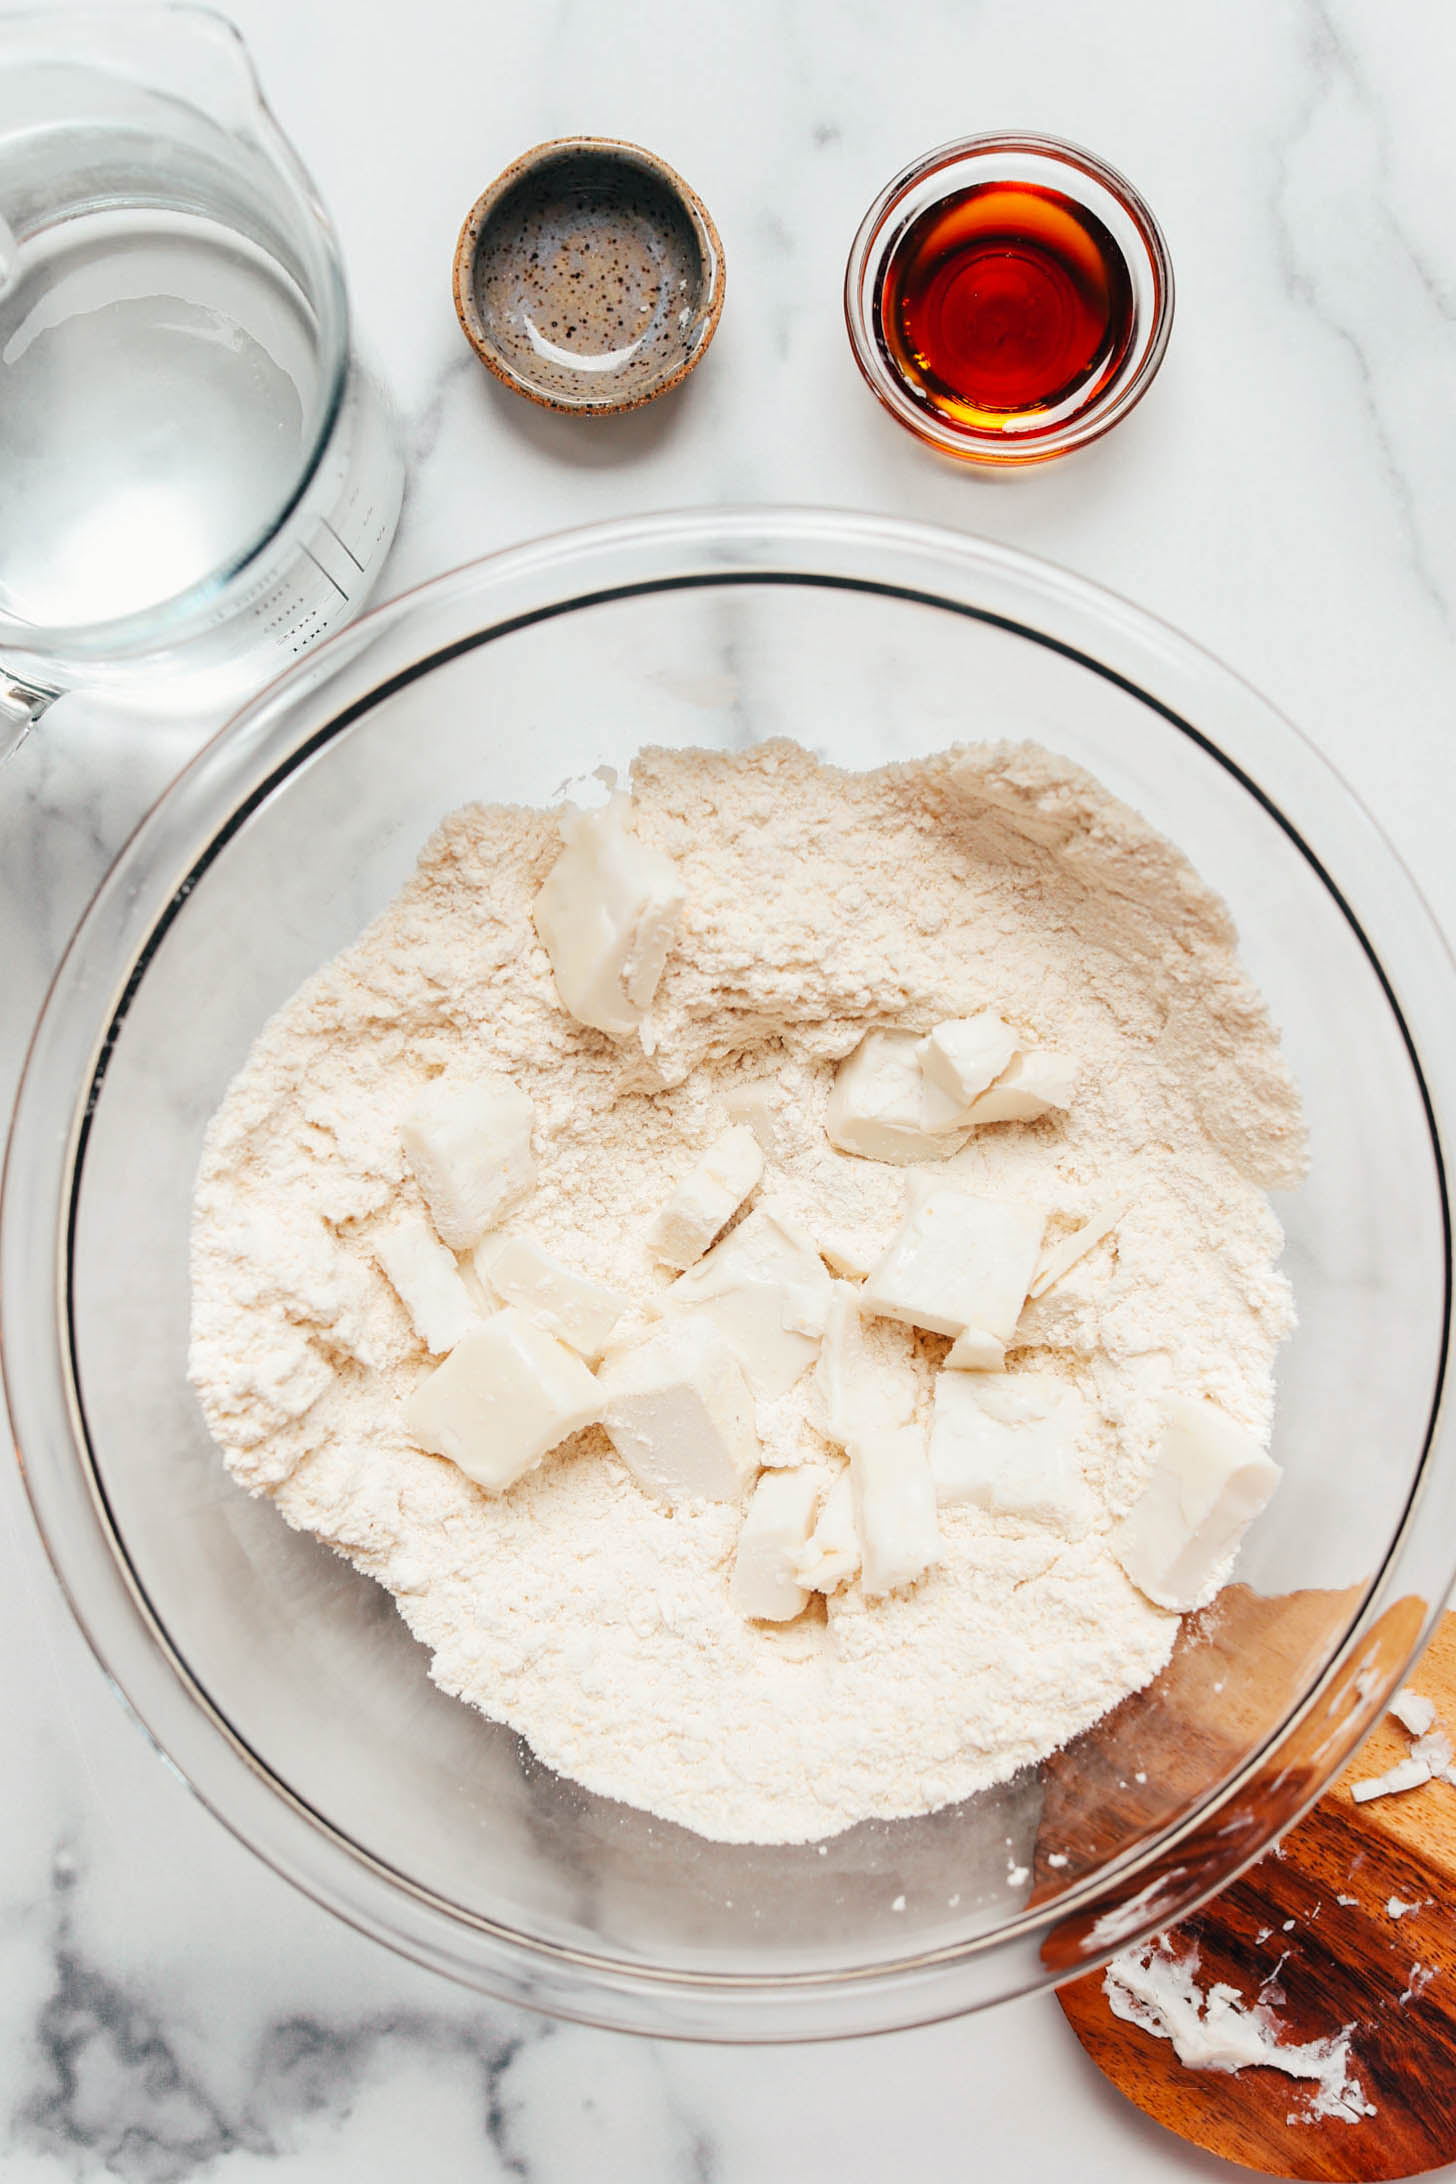
To a small mixing bowl, add a handful of ice cubes and cover with water. Set nearby. In a medium mixing bowl, combine the gluten-free flour and salt and whisk to combine. Working quickly, add in the cold vegan butter and use clean hands to begin pressing the butter into the flour. Avoid crumbling up the butter and instead try to press each piece into a flat “flake” — this will help create the best flaky crust! Continue until there are no large chunks of butter remaining.
-
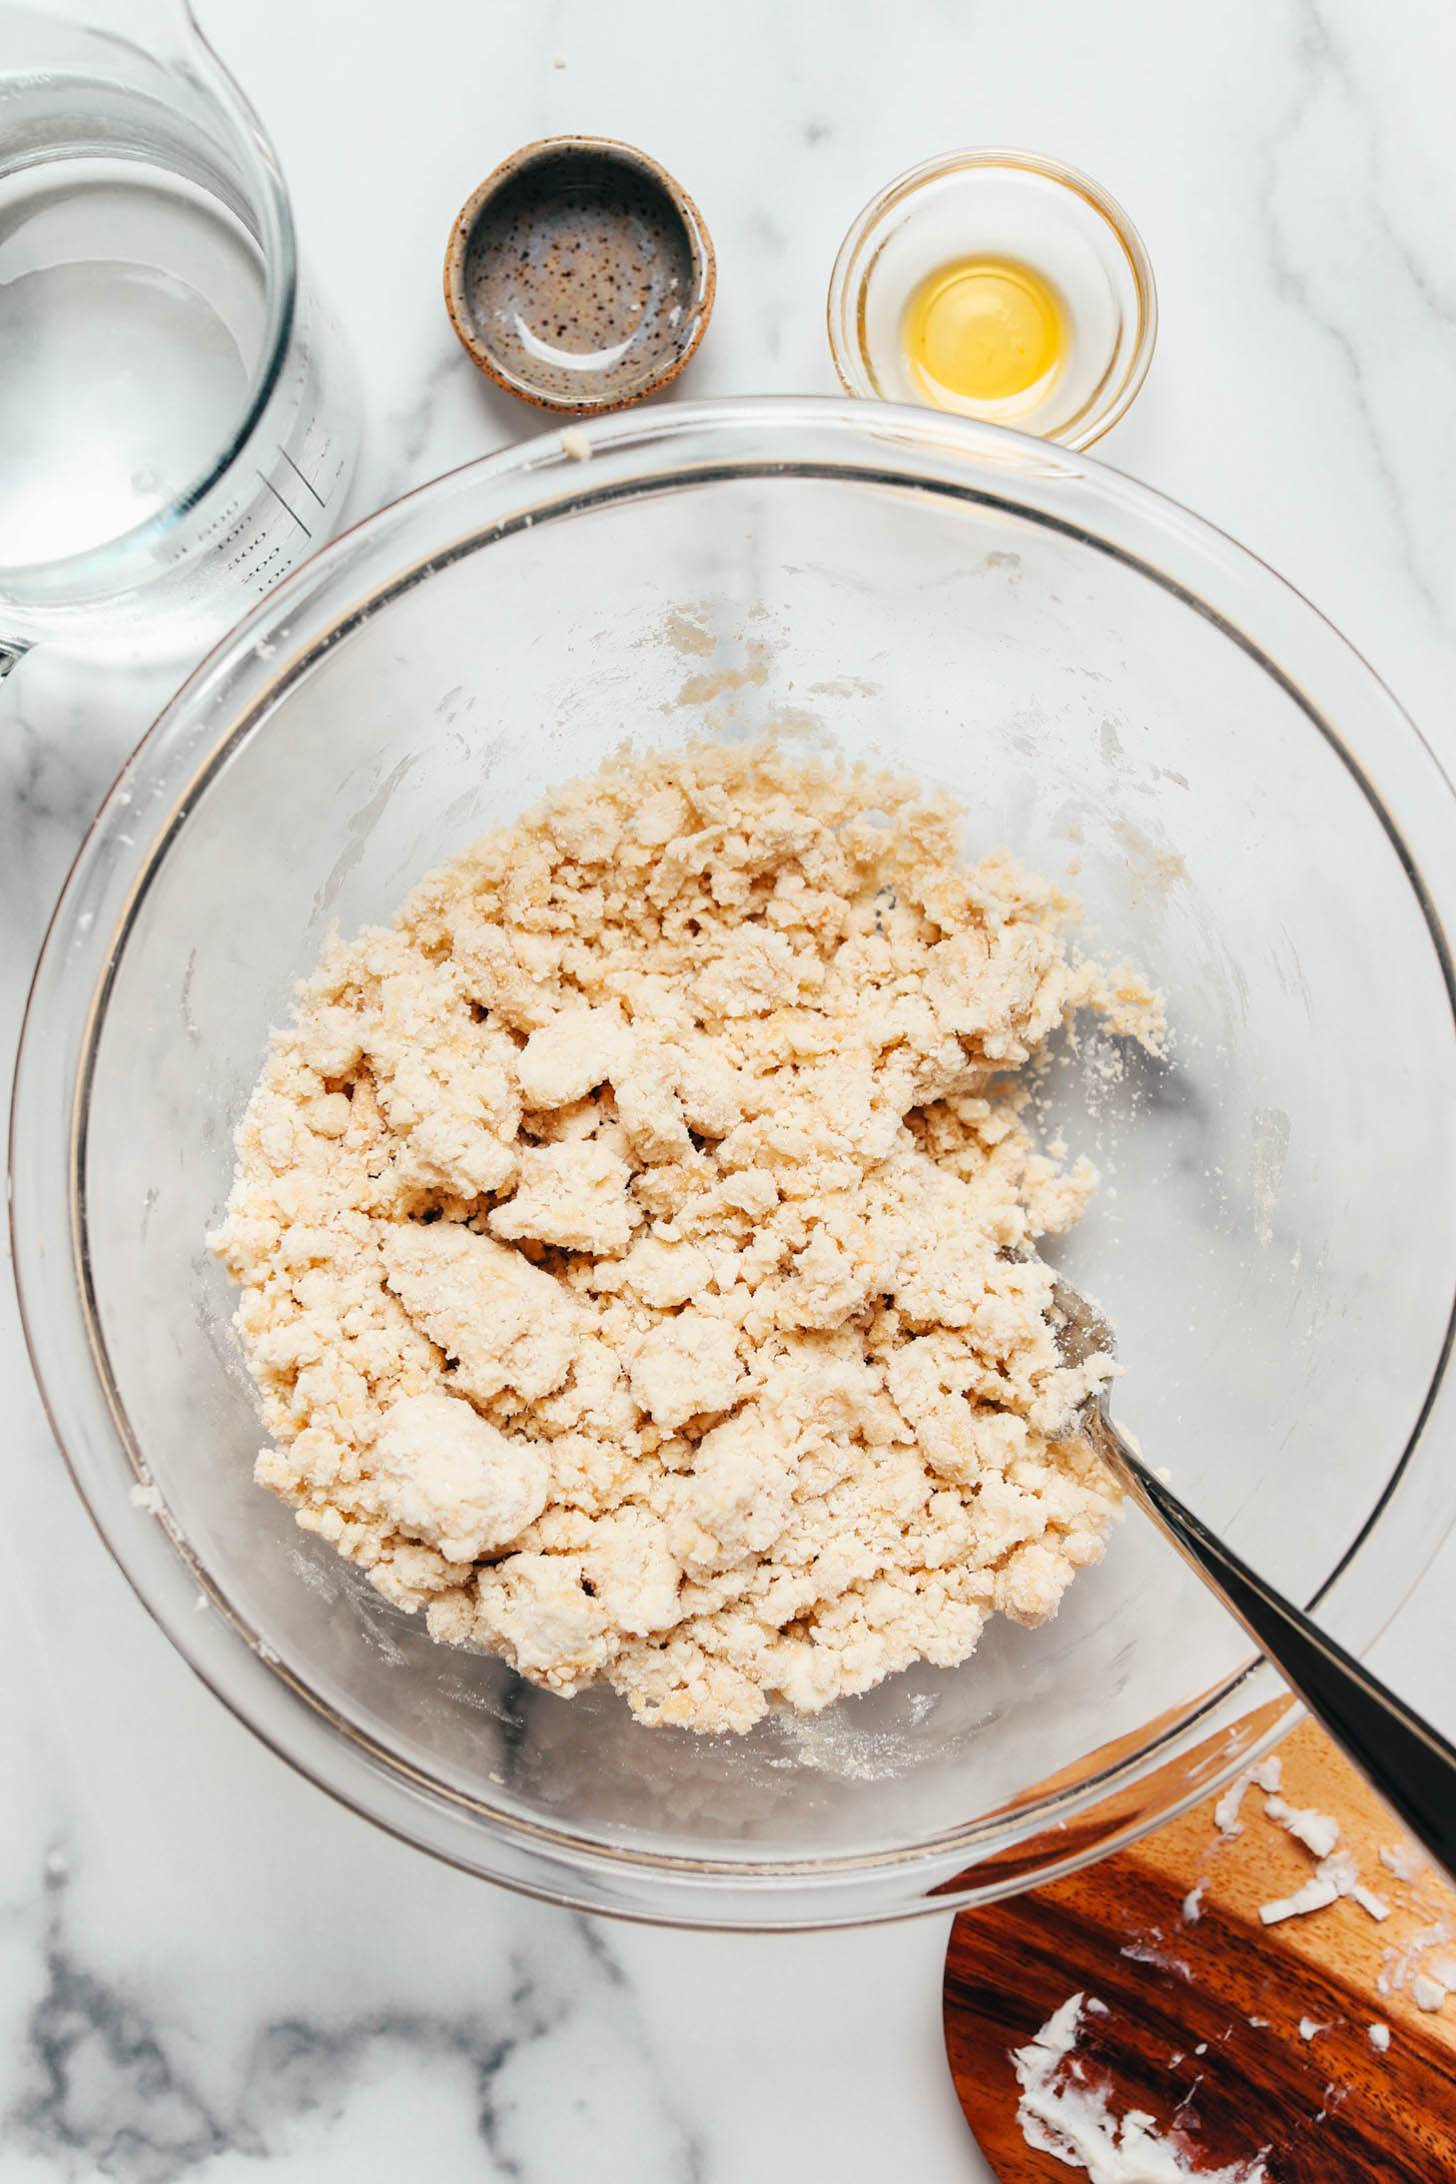
Add the maple syrup and 1 Tbsp (15 ml) of the ice cold water. Use a fork to gently toss the mixture together, doing your best to evenly distribute the liquid without breaking the butter down any further. Continue adding water until the mixture looks evenly moist and soft and sticks together easily when pressed between your fingers. It might look a little crumbly, but resist the temptation to add more water!
-
On a clean work surface, lay out a piece of parchment or wax paper and transfer the dough. Gather it together and press it into a “disc” about 1 inch tall by 6 inches wide. Wrap the paper around it and transfer to the refrigerator for 15 minutes. If you want to make your crust ahead of time, stop at this point and you can refrigerate for up to 2 days or freeze for up to 1 month, just make sure to thaw the crust (until slightly soft when poked) before rolling out.
-
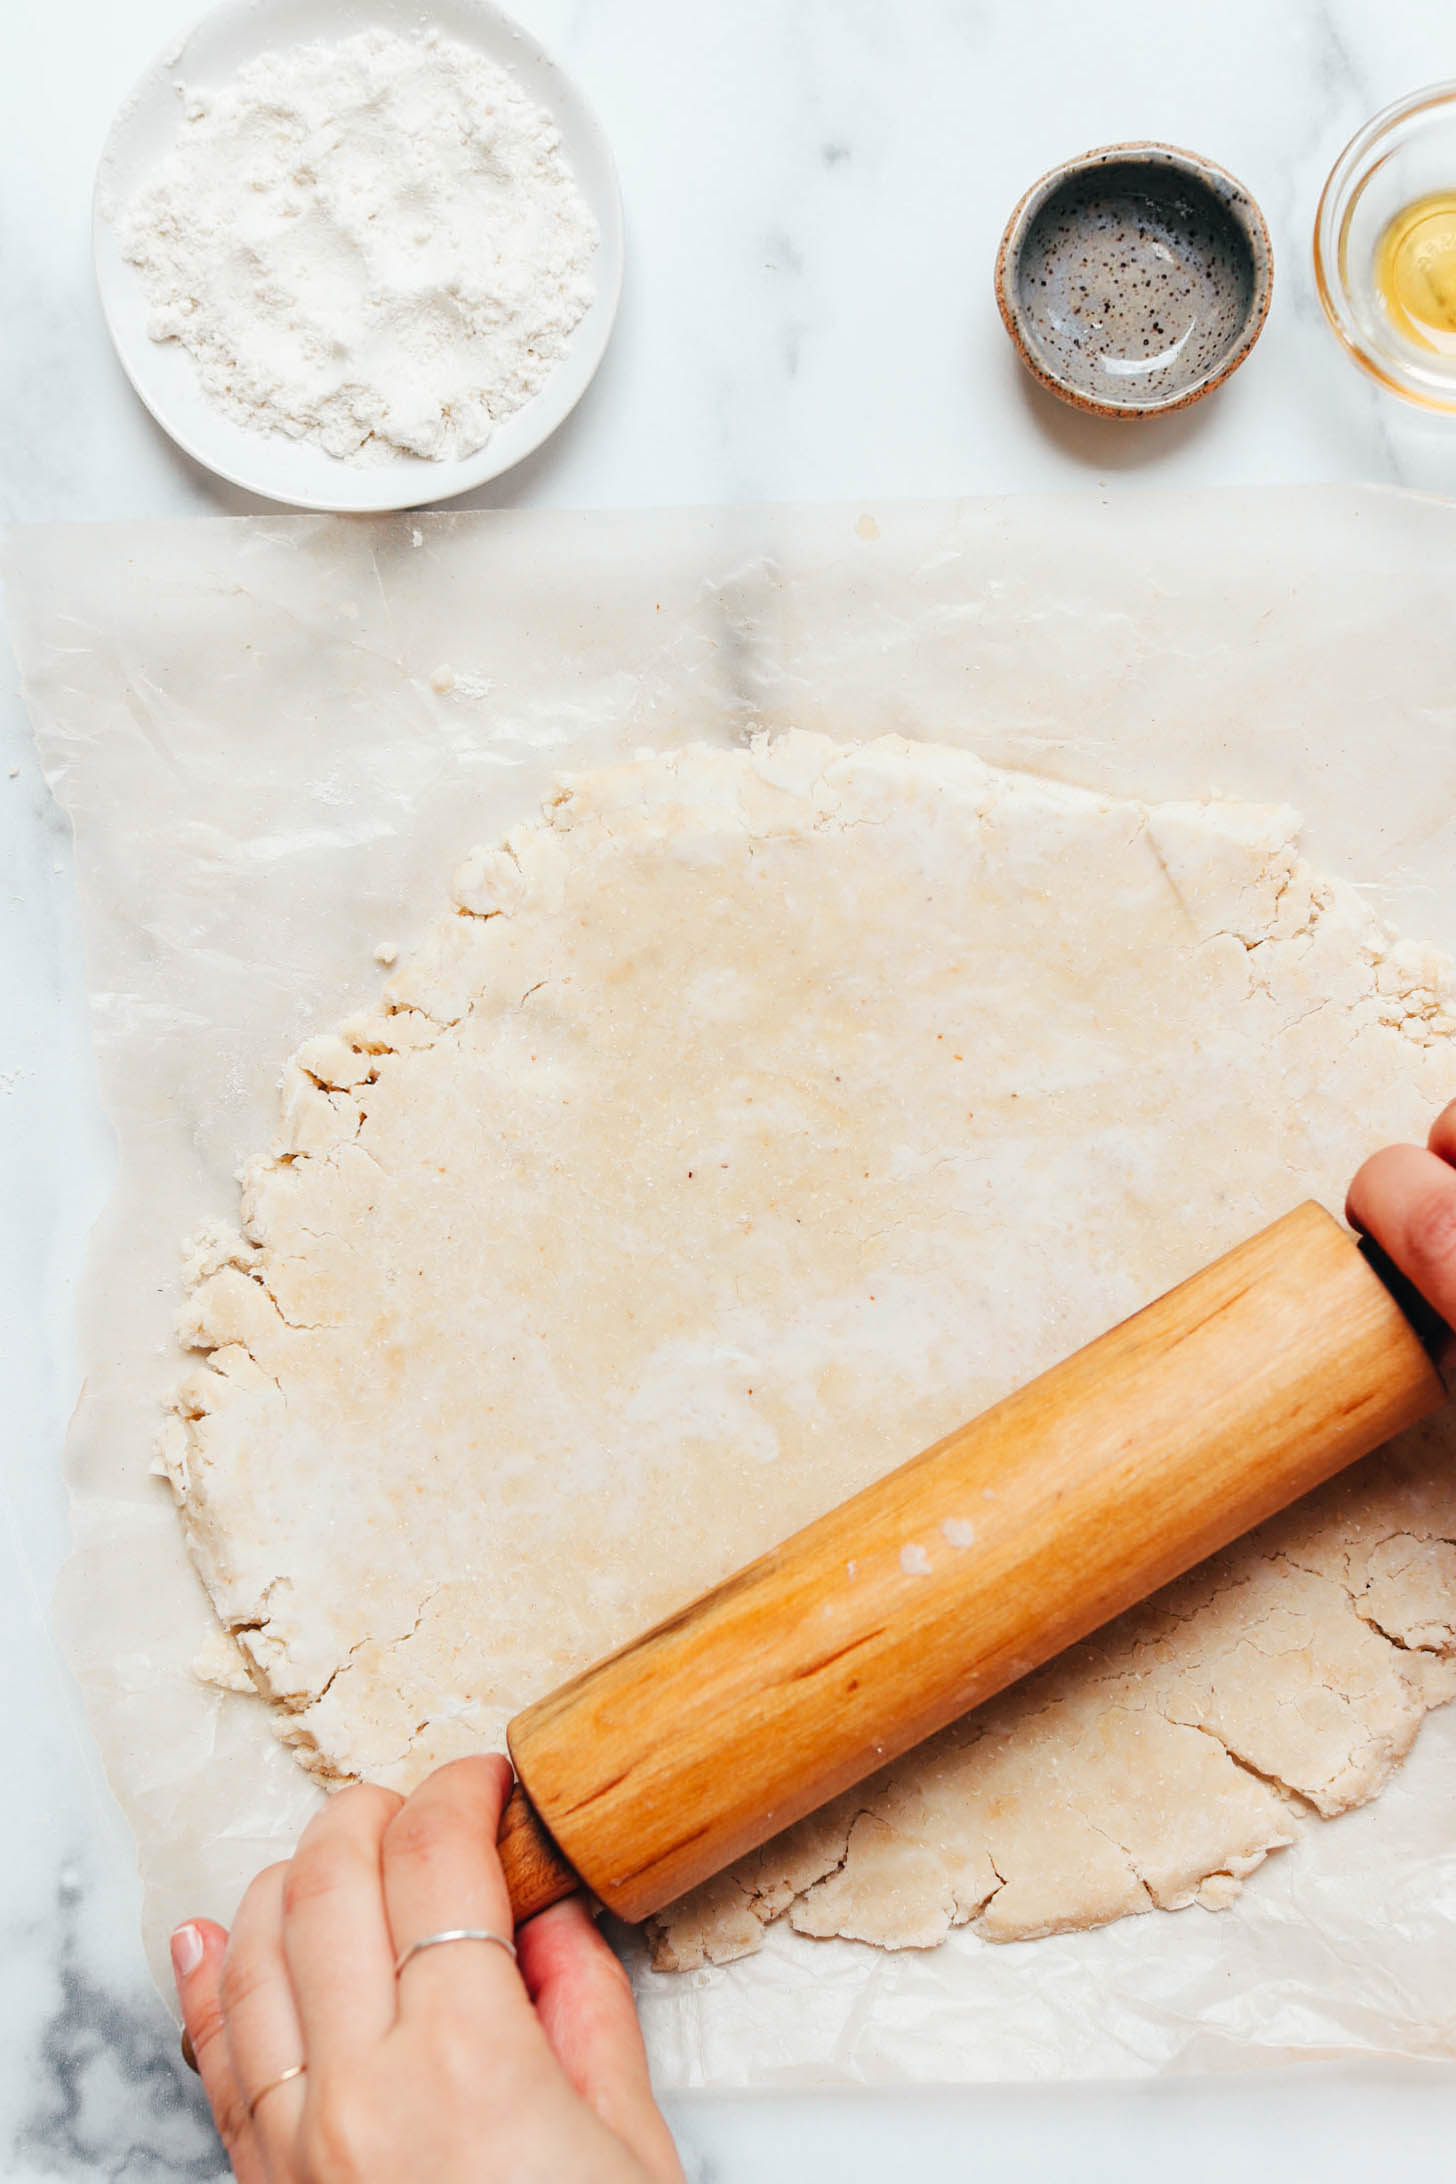
Carefully remove the crust from the refrigerator and work quickly to prevent the butter from melting. Unwrap the dough, leaving the paper underneath as a work surface. Sprinkle the top of the crust with a very light dusting of flour, then place another piece of parchment or wax paper on top of the crust and begin rolling it out until it’s ~11 inches wide and 1/4 inch thick. It can be helpful to start by “whacking” the dough to spread it out, then switching to rolling. If the crust is cracking a lot, give it a couple minutes to warm up slightly.
-
To transfer your crust, gently roll it up onto your rolling pin and unroll in the pie pan, or quickly (and confidently!) flip it into the pan. We chose to flip it. Press the crust into the pie pan so the bottom edges are smooth and patch any cracks with excess dough. Crimp the edges together with your fingers or press with a fork.
-
If making a pie with a filling that requires baking (i.e. pumpkin pie, pecan pie, apple pie, berry pie — recipe coming soon!), par-bake the crust for 20 minutes, until pale and dry to the touch. Then add your filling of choice and bake for another 30-45 minutes, or according to the recipe’s instructions. If making a pie with a raw/chilled filling (i.e. chocolate cream pie) you will want to par-bake the crust on its own for at least 30-35 minutes total, until the edges are golden and beginning to crisp, before adding your filling and chilling.
*Prep time includes chilling for 15 minutes and cook time includes par-baking only.
*Nutrition information is a rough estimate.
Serving: 1 of 12 slices Calories: 136 Carbohydrates: 17.1 g Protein: 1 g Fat: 7 g Saturated Fat: 5.4 g Polyunsaturated Fat: 0.1 g Monounsaturated Fat: 0.1 g Trans Fat: 0 g Cholesterol: 0 mg Sodium: 93 mg Potassium: 42 mg Fiber: 0.6 g Sugar: 1.1 g Vitamin A: 0 IU Vitamin C: 0 mg Calcium: 4 mg Iron: 0.2 mg